Portland Art Museum


|
Why hello there! It has been quite a while since my last blog and boy have things changed for K's Sugar & Spice! What started off as brownies in boxes has turned into dozens of cake pans, hundreds of cutters and plungers, and endless globs of colorful fondant. I have caught the cake decorating bug my peeps!
First of all, let's turn back the clock a few (cough, cough) years to high school. I was a scraggly young girl in an all girl's school on Guam with not many interests other than the usual graduating in one piece, cruising in my car, and, of course, boys. I also loved art and I was damn good at it! I painted portraits and landscapes using acrylic; blended charcoal to create shadows on still art; and even went as far as painted an ocean-themed mural for our local library when I was a senior. Art was in my blood. There was a certain peace that took over my body when I escaped into my artistic world. I could still envision myself driving to Paseo in Hagatna, laying out all my charcoal and just sketching the waves for hours. Life was so simple then. After high school, I didn't pick up my paint brush or drive to the beach to paint clouds. Life was now on the fast track to college graduation, marriage, and then children. The last time I looked at any of my art was when I was packing boxes to move to Hawaii. Now here I am in paradise and art has once again entered my life, but in a different aspect. I can't begin to tell you the serenity I feel when creating cake decorations or just assembling cakes in general. I absolutely love it. Carving, molding, and impressing has become the norm for my cake decorating. I play with colors and rolled sugar to create ART. I've purchased a cake airbrush set which I have yet to use - in fear that I will become addicted to airbrushing and never put it down. Just another dimension to my ever evolving cake world. I've never been so excited to see what my future holds. I never thought I'd be making wedding cakes and character figures, so life has been unpredictable indeed. And I like it :-) Til next time my fellow food (and art!) mongers. 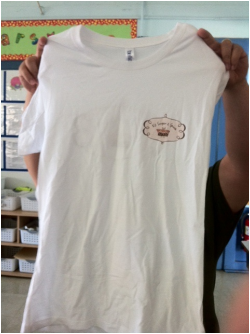 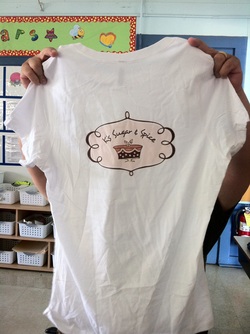 My husband surprised me in my classroom with my very own K's Sugar & Spice company shirt!!!! Here's looking to a future with KSS tank tops, hats, and maybe even key chains!
My best friend, Annalisa, is one of the best bakers out there. Her Sin, brownies, and pecan tarts are unmatched (all of which contain pecans by the way). While I was still baking cakes from boxed mixes, she was creating delectable desserts from scratch. One of the best pieces of advice she ever gave me? Roast your nuts to bring out the natural flavor and sweetness! And pecans are one of her favorites. If you haven't noticed, all my recipes containing nuts use only pecans. Walnuts are flavorless and bland as are almonds. Cashews have an odd aftertaste and macadamias are just a miss. Hazelnuts round out my top two, but they are not readily available in Hawaii stores, so I stick to Nutella. I began experimenting with pecans in savory dishes after I watched the FoodNetwork's Sonny Anderson incorporate pecans in one of her dishes. I set out on a mission to create a stick-to-your-ribs pasta dish that my whole family would love. I used all the four basic food groups - butter, heavy cream, pasta, and cheese. Now this dish is a once-a-month, cholesterol inducing kinda dish so take heart (or hold your heart and the husband does when I cook this). It reminds me of Fettucine Alfredo on steroids! Pasta with sage browned butter and roasted pecans 1 lb pasta (spaghetti or bow tie work best - oh I just like the itty bitty bows!) 1/2 cup REAL butter (no fake stuff) 1/3 - 3/4 cup grated parmesan cheese 1/3 - 1/2 cup heavy cream 1 cup chopped roasted pecans 3-4 minced garlic cloves (must use fresh) Sage to taste (fresh whole leaves or dried - I uses a little over a teaspoon, but it's a strong herb, so try 1/2 teaspoon first) Salt and pepper (to taste) 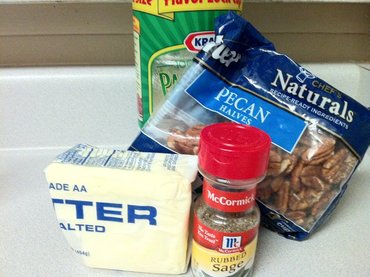 What a terrible picture of the ingredients! Better luck next time! This recipe actually calls for fresh sage, but I had a bottle of dry sage leftover from Thanksgiving so I used it. I'm absolutely certain (since fresh herbs are all the rage) that fresh would be better. 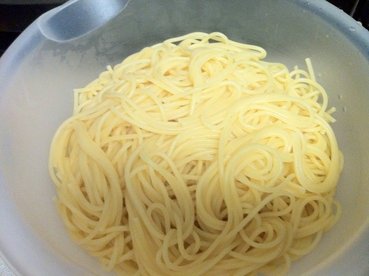 Use any kind of pasta you like. I don't care for regular spaghetti so I use the thin version. Bow tie pasta are one of my kids' favorites because they love too see the specks of pecans on them. Plus they're just fun to eat! 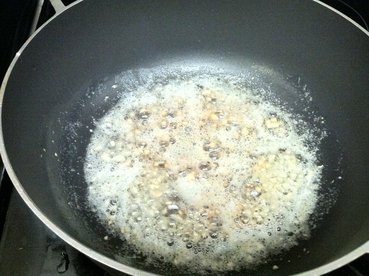 Now the basic "sauce" for this pasta is a browned butter. Not BURNT butter - but BROWNED. In order to accomplish a superb taste, you must - must - MUST watch your butter as it cooks. I use an unsalted, sweet cream butter because it tastes better. It costs a bit more than margarine, but you want to taste the sweetness and flavor of the butter. Melt over a medium heat and brown for about five minutes. Add minced garlic and saute. 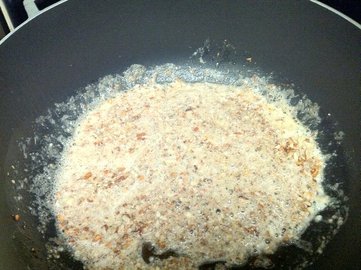 After the garlic has softened (do not brown the garlic as it has a bitter taste), add the sage. Sage is a popular herb most associated with Thanksgiving and Christmas. It's one of the main herbs found in poultry seasoning, so the aroma released is intoxicating! Perhaps that's why I enjoy making this dish - because it reminds me of Santa Claus and mistletoe! Saute lightly and then add the chopped roasted pecans. Afterwards, slowly mix in the heavy cream. I tried this recipe with half-and-half to cut the fat intake, but it didn't have the rich taste I was looking for. So heavy cream it is!! 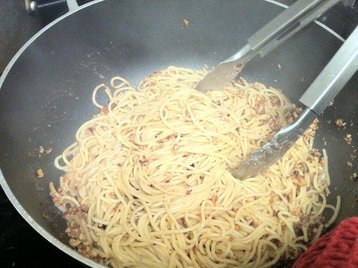 incorporate cooked pasta into browned sauce. 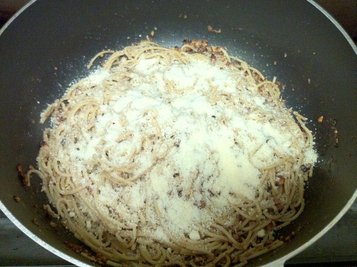 (My mouth is literally watering as I'm writing this blog!!) Add the grated parmesan cheese and season with a bit of salt (parmesan is already salty) and lots of pepper. I heard that Romano is also a great cheese to use in a dish such as this. I'll try it next time. We (and I mean me) are HUGE cheese fans. My fridge is never without parmesan because it's so versatile. One of my daughter's favorite pasta dishes? Pasta with butter and parmesan. 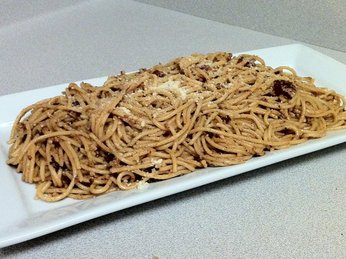 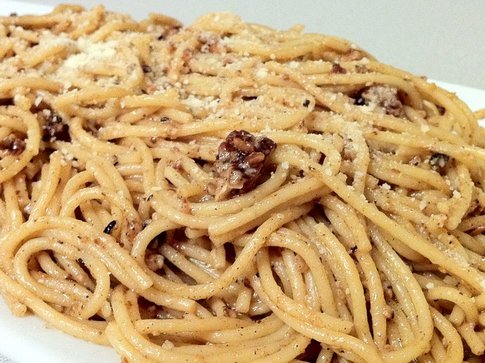 Annalisa would be so proud that I went out of my comfort zone and created a dish using pecans.
This pasta dish is an absolute keeper. I hope you enjoy making AND eating it! "Perhaps you should consider putting a "satisfied customer" page on your website... Tony is loving it"! - Anna   "I ordered a Red Velvet Cake for my mom's Christmas work party, and let me tell you, it was a HIT! Everyone loved it and literally ate it all up! From the moment the cake was unveiled out of its box, her co-workers were amazed at how exquisite and delicious the cake looked. Mind you, these admirers are also seasoned bakers so one can imagine how difficult it might be to impress them. But boy, were they impressed!
Thank you K's Sugar & Spice for providing a beautiful and delicious cake for their Christmas work party! My mom said she's already looking forward to ordering another one for them in the future!" - Ros "Her velvet cake is ono (very good). I am so glad to have had Kelley share her wonderful delights with me." - Joyce I have never been a huge fan of breakfast. Televison shows and movies often depict homogenous families eating perfectly cooked bacon and eggs while discussing the events of their upcoming day at the kitchen table. Rewind twenty-five years to my kitchen and you saw two children running out of the house with strawberry pop tarts (no icing yuck!) in tow as they rush to the bus stop. Dad was usually sleeping because he worked graveyard and mom was cooking his lunch for when he awoke. Bacon? Eggs? Not in my household! Breakfast was an alien concept to me. Fast forward to 2010. As a mother I made a vow to have breakfast with my children atleast twice a week - usually on weekends. (A teacher's schedule doesn't always allow us to sit around our table on a regular school day. I know - excuses, excuses!) Bacon, eggs, fried rice - you name it - my children usually love it. But what they truly look forward to are chocolate chip pancakes. Not just ANY kind of chocolate chip pancakes - but pancakes oozing with style and faboosh! Making these pancakes are so simple and my kids take turns helping me prepare them. Bisquick has this great melts-in-your mouth recipe, but the lemon juice that's called for makes the end results terrible! So the following recipe is hugely adapted from Bisquick. The ingredients are: 2 cups Bisquick pancake mix 1 1/4 cup milk 2 eggs 1 capfull of pure vanilla (usually it's 1/2 tablespoon) 1 tsp baking powder 2 tablespoons of sugar Lots and lots of semi-sweet chocolate chip morsels Powdered sugar Nonstick spray for pan Ice cream scoop (for uniformity duh!) Teflon pan (just makes life easier) 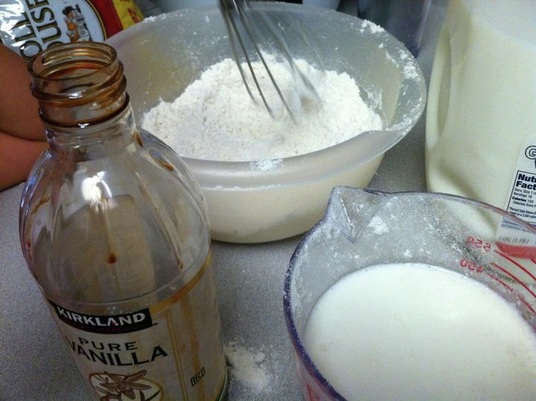 In a bowl, sift the Bisquick, sugar, and baking powder. In another bowl mix the milk, eggs, and vanilla. Please, please, please use PURE vanilla! That imitation stuff is just plain gross. The extra money you pay for quality products makes for exceptional results. Don't shortcut! No respectable baker uses that generic stuff. Add the liquid ingredients to the dry ingredients and mix thoroughly. 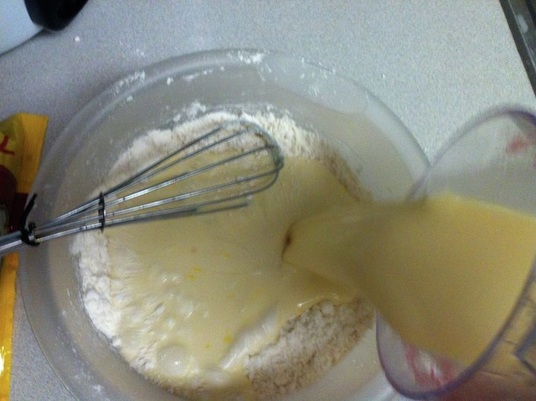 I like cooking my pancakes one at a time in a small skillet. No butter is necessary to grease the pan - it just makes soggy pancakes! I use Pam once to lightly spray the surface in the beginning of the cooking process. The batter is thinner than most because we prefer thin pancakes (they're almost like a sweet crepe). I use a scooper just so that each pancake is the same size. (YES - I am OCD and what of it?!?) 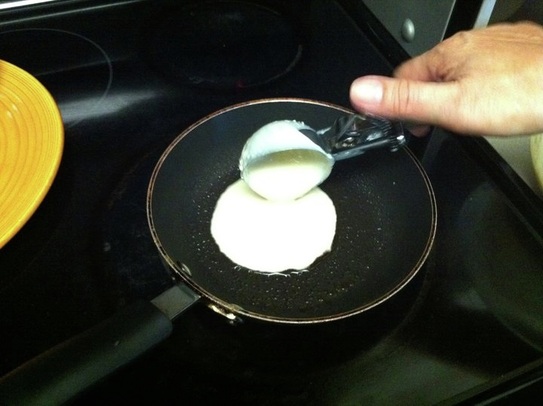 When the bubbles start forming, add a handful of chocolate chips. The edges will begin to turn light golden brown. This is when you flip the pancake over. 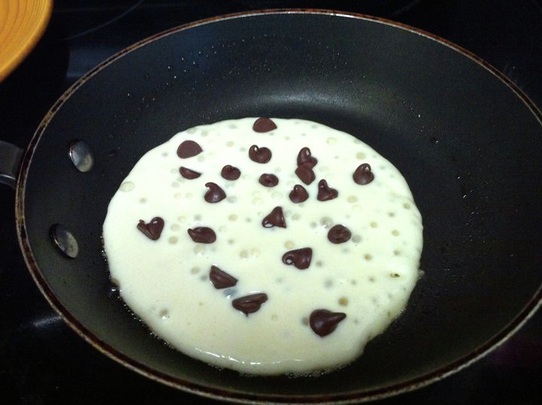 A perfectly golden brown pancake! Wait just a few more seconds for the other side to cook and then stack the pancake on a plate. 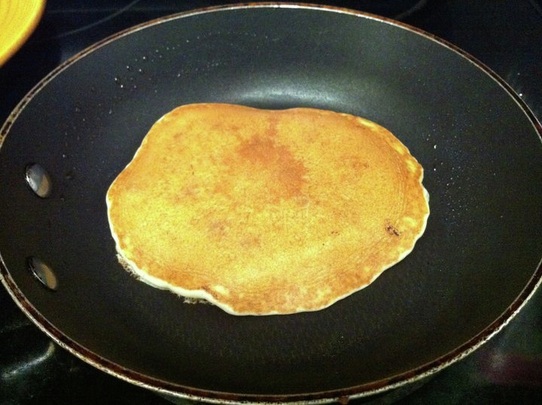 Just for that extra indulgence, more chocolate chips are added with a sprinkle of powdered sugar. We're not huge syrup people, and I usually eat them without utensils! (I know -so neanderthal of me!) On special occasions, we put a huge scoop of vanilla or rocky road ice cream on top of the pancakes. Absolutely sinful! These pancakes are fluffy, sweet, and fabulously delicious! Try this recipe and have dessert for breakfast with your family today! 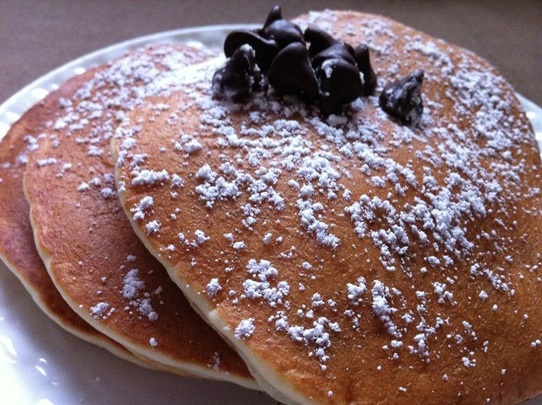 Being from a tiny island in the Pacific, I was raised on alot of fried spam and fried chicken. Fried foods are a staple on Guam (as well as Hawaii apparently) and I wouldn't have it any other way. Even the pickiest eater on the planet (yes, that's you dear cousin Christina M) enjoys fried food every now and again. I guarantee that after she reads this blog, she's going to want to hop on the first plane outta Oregon to sample these sweet, fried treats. I'm sure she'll personally deliver me to the kingdom of God if she bites into one of these delectable fried BANANA rolls because they are her fay--vo--rites!! These banana rolls are a sexier (can you say that about food?) version of the Filipino turon or banana lumpia. I just gave it some personality - naturally! I am hesitant about sharing the recipe because I hope to add it onto our full menu down the line....but I will share the cooking process for those die-hard fried fooders and closet foodies (you know who you are). Unfortunately the photos I shot should've been in landscape format, but it's too late now because I ate all the samples! So, the following photos give you an "quasi-artistic" perspective. 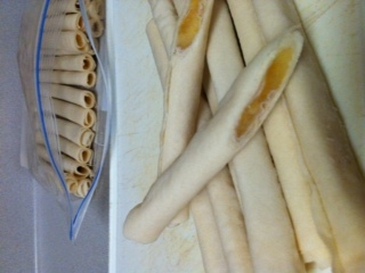 To ensure a great looking presentation, you must, must, must freeze the rolls before frying. This helps to keep their shape during the process. My mother-in-law is an expert roll wrapper which is why they're all perfectly even (aka con--trol--freak! I tell ya - it takes one to know one!) 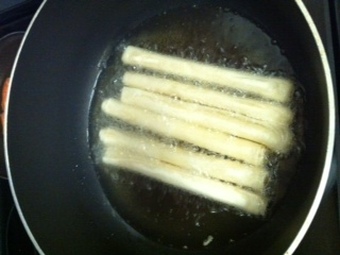 The rolls are fried until they are a light golden brown. If they're fried too dark (which I did because I turned up the heat too high in my eagerness to sample them) the rolls develop a bitter taste. That's a no-no. I place the rolls on a paper towel to soak up some of the grease. Then I just cut the rolls in half diagonally and sprinkle powdered sugar on them. Instant stardom! I'm not a gambler by nature, but I will bet good money that you can't eat just one of these babies. I ate somewhere between seven and nine rolls in one sitting! (Don't judge me. It needed to be done for research's sake) The killer is the naturally sweet flavor of the bananas with its' creamy texture. The other (secret, sorry!) ingredients balance out the sweetness with just a hint of tang. But what tops it all is the deep fried wrapper that crunchifies in your mouth with a slight airiness right before you bite down into the filling. Sublime. You'll never look at bananas - or fried foods - the same way again. 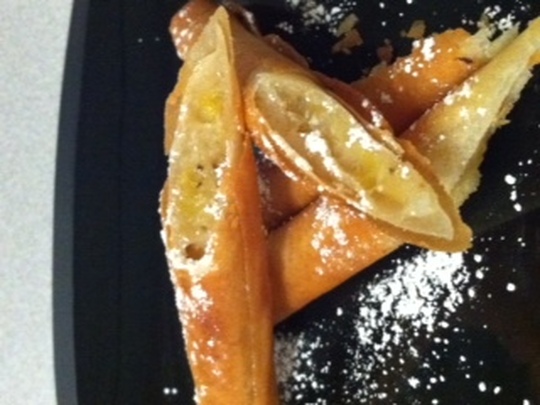 Yeast is a scary monster. The first time I battled yeast was when I was ten-years-old in my tiny Guam 70's-style kitchen. I was attempting to make Chamorro rolls if memory serves me correctly. It was a recipe I clipped from the Pacific Daily News because, for some apparent reason unbeknownst to me, I just loved reading recipes in newspapers and magazines. I still have clipped recipes from over 20 years ago in my recipe folder - but that's another blog for another time.) Anyway, my mom kept yeast in her cupboards so I just used a packet and followed the recipe directions to a tee. To make a long story short, my "bread" came out as hard as a rock, never rose, and the feeling of pure failure traumatized me for 24 years. Seriously. (Mind you it is quite humiliating to confess this.) I was anti-yeast and standing my ground. So let's rewind for a second. For those of you who aren't professional cooks like myself (hahaha), yeast are tiny organisms that are "awakened" when introduced to an element like sugar in recipes. They munch on the sugar and then release carbon dioxide which fills balloon-like bubbles in the dough. Once the bread has baked, this is what gives bread its airy texture. Interesting huh? Without these tiny little burping monsters, we'd be eating hard-rock bread from the stone ages - and I know a little something about hard rock bread! A few months ago, I mustered up the courage to give yeast another try. There was a simple recipe on sweet rolls in the Honolulu Advertiser (which I lost!) which seemed harmless and easy enough for an amateur baker such as myself. So I surrendered the white flag after 24 years, called a truce, and bought a bottle of the sleeping dragons from Walmart. Here's a tutorial on baking sweet rolls: 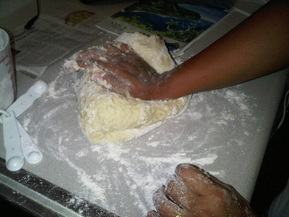 Preheat your oven to 400 degrees. Then dissolve 2 1/4 teaspoon of yeast in 3/4 cup of warm water. Not hot. Not cold. WARM. 110 degrees. If the temperature is off, the yeast will die and you'll be left with a bowl of stinky, murky water. The water and yeast will start bubbling - this is how you know you're yeast is still alive and it's going to work in your recipe. I let the yeast foam for about 15 minutes. In another bowl, combine 1 cup sugar, 1 egg, 2/3 cup milk, and 1/3 cup butter. Believe it or not, when I wrote this recipe on my facebook page, I forgot to put the cups of flour. I'm guessing it was between 5 -6 cups. Mix thoroughly. Add the yeast mixture and mix the flour slowly until a dough forms. The fun part - knead the dough on a floured surface. I didn't have my Kitchenaid yet - which has a neat attachment for kneading dough - so I old-schooled it. Kneading is not fun, but it must be done. 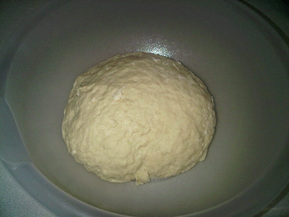 After mercilessly kneading for a few minutes, place the dough in a bowl and cover with a clean hand towel. I placed my bowl on top of my warm stove. It'll rise for 90 minutes. If it doesn't rise, you messed up the yeast. Don't bother going on...just start all over again. After dough rises, punch it down and knead AGAIN for a few minutes. 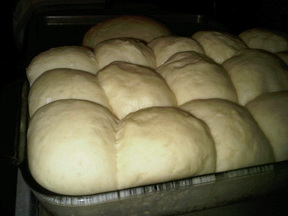 Make small balls and line them up in a pan. This glass pan worked really well. Cover and allow the dough to rise for another hour. When the dough looks like unbaked rolls, then it's time to brush them with an egg wash (which is an egg and milk mixture.)  Bake for 15-20 minutes in the middle rack. Keep an eye on them to make sure they don't get too dark. A light golden brown is ideal. This one loaf of bread was 24 years in the making. Yeast became my friend afterwards and we've made malasadas and different types of bread together ever since. What is the lesson learned? Try and fail, but don't fail to try. You're allowed to make mistakes when cooking - that's how you learn. Wish someone had told me that because 24 years is an awful long time to hate yeast. Have a great time baking :-) Send me pictures of your baked goods and I'll post them on my website. I'd love to see how your bread turns out! Dulce de Leche is somewhat a mystery to this part of the world. If you ask me, it sounds more like a dance invented by Don Johnson in the 80's as he swaggered through his sexy scenes in Miami Vice: "Hey foxy lady - wanna dulce de leche til dawn?" In essence, dulce de leche is a thick caramel made of milk, sugar and additional flavorings and is mostly popular in Latin America. Other parts of the world have their own version. But Alton Brown, the king of all geek cooks, is the chef whose recipe I followed. Granted I NEVER tried dulce...nor have I ever seen it in person. What really sparked my interest were the numerous dulce de leche cupcakes on Cupcake Wars. Damn those cupcakes! I turned to Alton's recipe online and I thought, "now this sounds like a difficult and laborious process - SOLD!" What better way to spend three hours of my life than watching over a pot of boiling brown milk?!? Now it all sounds easy cheesy since there's only three main ingredients - milk, sugar, and vanilla. But what kills ya is the STIRRING and the praying to the caramel gods that your dulce doesn't end up burnt on the bottom of your pan with only 30 minutes of boiling left. Before I begin my montage of amazingly interesting photos of cooking dulce, I just want to remind you that if you finish this process and see it to the bitter end, you absolutely WILL NOT get back those three hours you spent slaving over a pot of caramel. They'll be gone. Kaput. Matay Forever. So here goes: 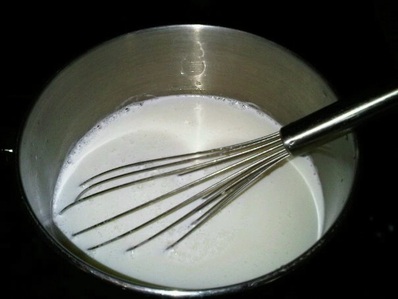 That's four cups of regular whole milk, a couple of cups of sugar, and some vanilla. Whisk and simmer until the milk boils down to half the amount. I am now officially a whisking wizard thank you. 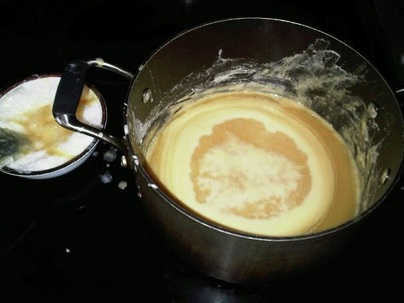 I'm watching this boil for one and a half hours and thinking about how stupid I was for not going to Don Quijote (cause you know this stuff isn't at Foodland!) and buying a jar of ready made dulce. There's no way around stirring and stirring and stirring and ... you get the picture! Oh - see the white stuff floating to the top? All that nasty gunk has to be scooped up and discarded. 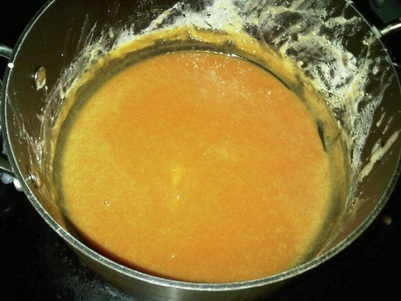 I am incredibly impatient and want to see the final results already...but I still have one more hour to go. Now the milk and sugar have thickened into a nice, gooey caramel sauce. It tastes ok. 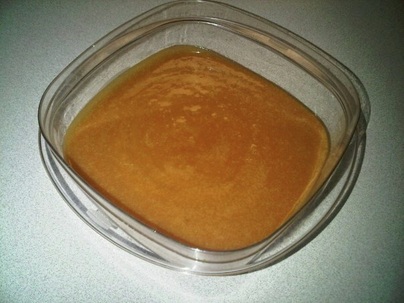 Three hours on the dot! Four cups of milk and two cups of sugar later and I'm pretty much left with a little more than a spoonful of dulce de leche. And the taste? Well, I wouldn't eat it with a spoon like they do in Brazil. My brother-in-law who grew up in Miami eating the stuff said it needed to be thicker and sweeter. However, it tasted amazing when combined with our flan so it wasn't a complete waste of time.
Then guess what? As if I couldn't have felt any worse about giving up three hours of my arm strength to a wooden spoon and a pot of milk - I later found a shortcut online!!! Step 1 - Buy a can of condensed milk (which coincidentally is boiled down milk and sugar!) Step 2 - Pour can of milk on cookie sheet or tray. Bake in oven for an hour. Step 3 - Enjoy (wholeheartedly) the dulce de leche that you worked smarter not harder for. It's a good thing you read this blog first isn't it? I'm a very unconventional person. My whole life everyone has told me that I march to the beat of my own drum. I don't deny it - as a matter of fact I embrace it because it's what makes me, me! Or I just blame it on my self-diagnosis of ADD. Whatever it may be, I have never been so conflicted about something as sinful and magical as chocolate.
Husband: When are you going to create a fudgy chocolate cake? Me: I don't know...I don't feel like honoring chocolate in such a majestic form. Husband: It's chocolate! Get some eggs and milk and make a moist cake woman! Me: It's just not right... The same conversation has echoed through our hallway and kitchen repeatedly for the past four months. What is stopping me from creating a simple cake? After all it's been scientifically proven that 9 out of 10 people crave chocolate in one form or another. A decadent chocolate cake will only add to a growing number of products our company can offer buyers. So it only makes sense to give the people what they want! I figured it out this afternoon (just in time for a blog post no doubt): Everybody likes chocolate. (Yes, in my world, 90% means everybody). But of course! Kelley simply can't make something that everybody already LOVES! It's a travesty! It goes against all her beliefs and rule breaking ways! She can't possibly conform to society in such a manner! And I haven't...If I get enough requests out there for the ultimate chocolate cake - which I know I can create - then I may change my mind. For now - let them eat cake!!! |
 AuthorI'm a school teacher whose mind is chock-full of useless information about topics not ordinarily of any interest to others. However, I've become extremely passionate about baking, cake decorating, and blogging and this website gives me the platform to share all that information with people who enjoy learning new things! Thank you for visiting and I hope you return often. |
